Drying is one of the simplest ways to preserve fresh foods for longer storage. This beginner’s guide to dehydrating food will cover what kinds of foods you can dry, temperatures and techniques you can use to dehydrate at home, how to prepare food for drying, and some tips for success, along with food dehydrator recommendations.
What is the purpose of dehydrating food?
Using a low temperature, the food is slowly dried to remove most of the water. When sufficiently dried, the food does not have enough water for bacteria, yeasts, or molds to grow so you can safely keep dried food at room temperature.
Drying is one of the easiest food preservation methods there is, and there isn’t a big learning curve. Anyone with even modest cooking skills can do it.
What do you need to dehydrate food?
If you have never dried foods before, you can start by drying a few types of foods in your oven. There is little or no investment in equipment. Oven-drying is a great technique if you are drying food for the first time or if you plan to only dry foods occasionally.
If you want to dry foods frequently or in large quantities, then I recommend you purchase a food dehydrator appliance. Your oven uses more energy and takes longer to dry foods than an electric food dehydrator appliance. Find some suggested home food dehydrators later in this article.
(Try the Nesco Snackmaster Pro, Amazon’s choice – and ours – for a moderately priced food dehydrator that works well.)
Types of food to dry
Drying can be used for many common foods, including meats, fruits, and vegetables. First-timers can use the oven drying method for foods like beef jerky and produce you might otherwise throw out, such as bananas, celery, and onions.
Beef jerky is a convenient high protein snack food. It is easy and inexpensive to make it home.
Chopped celery and onions can be dried for use in soups, stews, casseroles, and stir-fries. You can also dry celery leaves and use them to add a celery kick to recipes, in addition to or as a substitute for parsley.
Dried banana slices make great snack chips. You can also use them in smoothies or baked goods or add them to your breakfast cereal.
Many other foods can be dried, of course. Some of my favorites are apple slices, pitted cherries, strawberries, melon slices (sweeter than candy!), diced or sliced carrots, corn kernels, eggplant, tomatoes, and zucchini—the last three in slices or cubes for use in gratins or ratatouille.
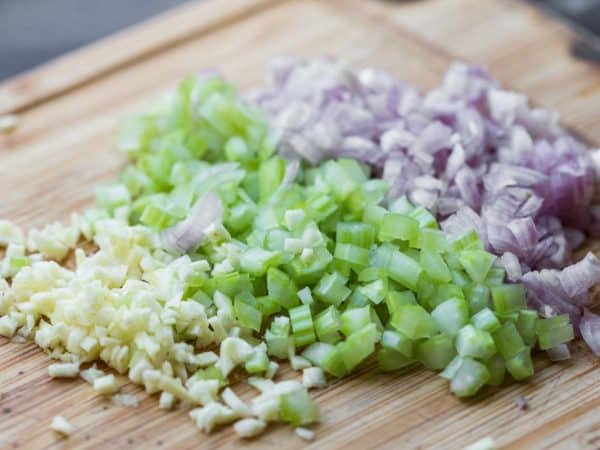
Drying is a great food preservation technique to use for produce you might otherwise throw out, such as celery and onions.
Trays for oven-drying foods
Foods dried in the oven need to be placed on mesh-screened trays that allow for plenty of air circulation.
When drying foods in an oven, an economical solution is to stretch cheesecloth or natural (not bleached) muslin over an oven or cake cooling rack and secure it with masking tape, paper clips, or clothespins.
A more permanent but more costly option is to have window screens made at a hardware store. For drying food, the screen material needs to be food-safe, such as silicone, plastics (recyclable #1, #2, #4, #5 are generally food safe plastic), Teflon, or stainless steel.
Avoid screen materials for drying foods that can leach harmful chemicals, darken the food, or melt at low temperatures. This includes uncoated fiberglass or vinyl screens, metals other than stainless steel, frames made from green or freshly cut wood, and fragrant woods such as pine, cedar, oak, and redwood.
If you purchase a food dehydrator, they come complete with food-safe screens.
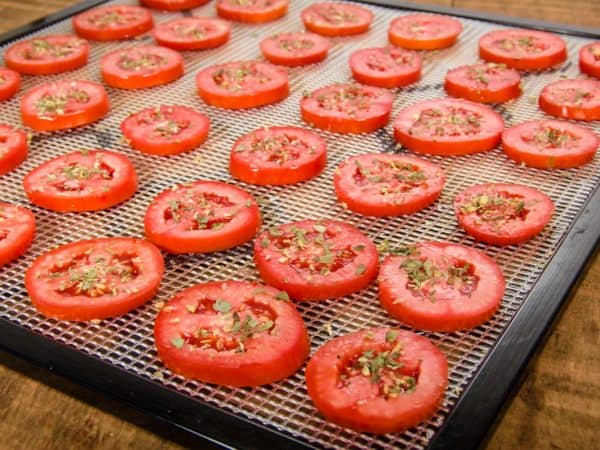
Many foods can be dried. Popular choices include apple slices, pitted cherries, strawberries, melon slices, diced or sliced carrots, corn kernels, eggplant, tomatoes, and zucchini.
Related: Sensible Ways to Save Money Now
Best temperature for drying food
When drying food, you want to slowly evaporate the water in the food, rather than cook it. Foods begin to cook at 140F, so use temperatures lower than this for most —but not all—foods.
For fruits and vegetables, you usually preheat a food dehydrator to 125F to 135F. Most ovens don’t go this low, so set the oven temperature to the lowest setting. Then use an oven thermometer and maintain a lower drying temperature by leaving the oven door partially open.
For beef or other meats made into jerky, I recommend a drying temperature of 165F to 185F. This higher temperature is recommended by the U.S. Department of Agriculture (USDA) to achieve a safe internal temperature of 145F within the first two hours of drying.
Many jerky aficionados prefer the texture of jerky dried at a lower temperature, between 145F to 165F.
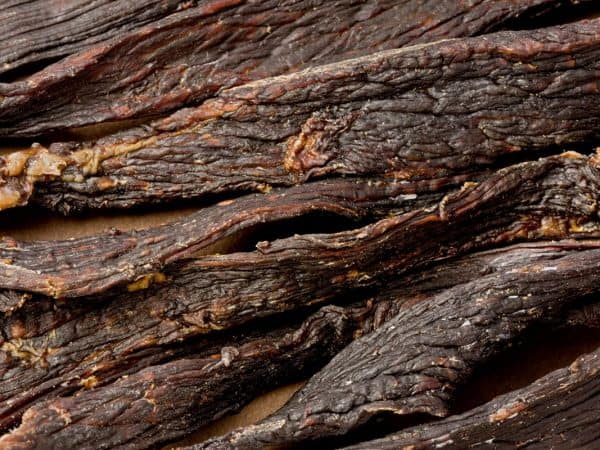
Beef jerky is easy and inexpensive to make it home.
How to prepare foods for drying
Drying does not improve the quality of food. So be sure to start with food that is in perfect condition. Select fully ripe produce without blemishes and fresh, lean meats for jerky.
You want chopped or sliced pieces that are 1/8- to 1/2-inch thick. Size is somewhat a matter of preference. Thicker pieces will take longer to dry. Too thin pieces may nearly disappear! Don’t be afraid to experiment.
Here are some suggestions for preparing specific foods:
- Banana: To make slicing easier, place peeled banana in the freezer for 10 minutes to firm. Slice 1/8- to 1/4-inch-thick, across, lengthwise, or diagonally as preferred. To prevent browning, toss slices with lemon or lime juice.
- Celery: Separate the stalks, wash, and trim the ends and tops. Slice stalks across or chop into 1/4- to 1/2-inch-thick pieces.
- Onion: Peel and slice the onion bulb into 1/8- to 1/2-inch-thick slices. Cut across slices to chop into even pieces.
- Beef for jerky: Use lean meat such as round, sirloin, or flank and trim all visible fat or your jerky will go rancid very quickly during storage. To make slicing easier, freeze the meat for 30 to 90 minutes until firm. For tender jerky, cut against the grain (strips come apart if pulled). For chewy jerky, cut with the grain (strips stretch when pulled). Cut the meat into slices 1/8 and 3/8 inch thick. If desired, marinate strips in the refrigerator for 1 to 8 hours. Use barbecue, teriyaki, or other meat marinade. Drain marinade and pat meat dry before drying.
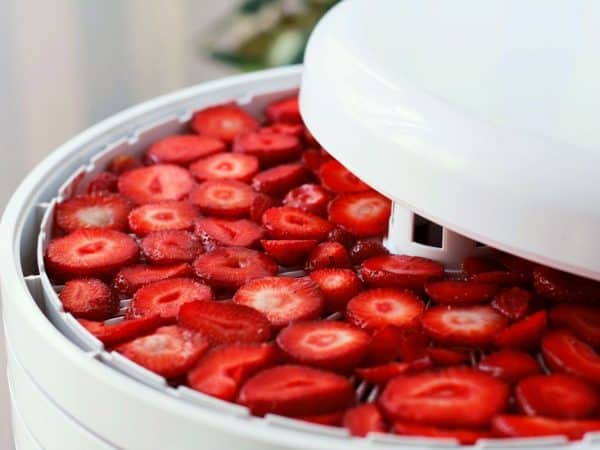
Slice or chop foods 1/8- to 1/2-inch thick and place on dehydrator trays without overlapping.
Basic steps to dry foods
The steps for drying food are quite simple. Outlined below are the general steps for drying most types of foods. For more information about drying trays and preparing the food, be sure to read the previous sections.
- Preheat (a gas or electric) oven to the desired drying temperature.
- Prepare food-safe trays for drying foods.
- Prepare food for drying. Arrange prepared food on the drying trays in a single layer without overlapping — touching is okay, they’ll shrink as they dry.
- Dry food until pliable and chewy or crisp and brittle or crisp as desired. If needed, decrease the oven temperature by propping open the oven door with a wooden spoon or folded towel.
Drying time is typically 4-8 hours. However, it can range greatly (2 hours to 36 hours or more) for thicker, moister foods (such as tomato wedges) or when humidity is high (such as the Midwest in summer).
- 𝗕𝗜𝗚𝗚𝗘𝗥 𝗧𝗛𝗔𝗡 𝟳 𝗧𝗥𝗔𝗬𝗦: With 6 stainless steel trays providing 6.5 ft² of drying space, this dehydrator is 27% larger than standard 7-tray models, allowing you to dry more food at once
- 𝗠𝗢𝗥𝗘 𝗣𝗢𝗪𝗘𝗥𝗙𝗨𝗟 & 𝗘𝗙𝗙𝗜𝗖𝗜𝗘𝗡𝗧: Equipped with a 600 W motor, rear-mounted drying fan, and upgraded airflow technology for faster, more even drying without manual intervention
- 𝗦𝗨𝗣𝗘𝗥 𝗤𝗨𝗜𝗘𝗧 𝗢𝗣𝗘𝗥𝗔𝗧𝗜𝗢𝗡: Features an advanced brushless motor with noise levels below 48 dB, letting you dehydrate your food quietly — even overnight
- 𝟭𝟳𝟲 °𝗙 𝗠𝗔𝗫 𝗧𝗘𝗠𝗣𝗘𝗥𝗔𝗧𝗨𝗥𝗘: Adjust the dehydrator between 95-176°F in 1°F increments. Higher temps ensure safer beef jerky. USDA recommends 165°F for safe jerky
- 𝗙𝗨𝗟𝗟𝗬 𝗘𝗤𝗨𝗜𝗣𝗣𝗘𝗗: Includes 5 trays, recipe cookbook, mesh screen, and fruit roll sheet. Search for 'COSORI Dehydrator Accessories' or 'CRP-P501MS-WUS' or 'CRP-P501FR-WUS' for more options
- 𝗖𝗨𝗦𝗧𝗢𝗠 𝗣𝗥𝗘𝗦𝗘𝗧𝗦: Enjoy 4 user-friendly presets (jerky, fruit, vegetables, yogurt) and adjust them to your preferred time and temperature
- ADJUSTABLE TEMPERATURE from 95ºF to 158ºF that foods are dehydrated at their optimal temperature and horizontal air flow distributes heat evenly and efficiently.
- HEALTHY SNACKS: Prepare 100% all-natural dehydrated foods and snacks with no added sugars, additives or preservatives. No more processed junk food, dry healthy fruit rolls, trail mix, granola, etc.
- FUN AND CRAFTS: Perfect for hobbyists to dry flowers, potpourri or dough crafts and pet lovers to prepare healthy and delicious 100% natural treats for their furry companions.
Tips for drying food successfully
To speed up drying, open doors and windows in the room to promote more airflow. You can also place a fan near the propped-open oven door so that it blows away moisture from the food.
To reduce drying time, dry foods on days when the humidity is low, dry small quantities of food at one time, cut the food in smaller pieces or thinner slices (1/8-inch), and space the food well apart on the drying trays (one to two inches).
The length of drying time can fluctuate widely for the same types of food. Smaller pieces or thinner slices may dry in a few hours. But I’ve had tomato wedges and plum halves take well over 24-hours.
Drying time depends several factors including the size of the pieces, the temperature of the room, and the relative humidity. Someone drying foods in the humidity of the Midwest will experience much longer drying times than someone in the desert Southwest.
The extent of dryness is a matter of preference and depends on the intended use. Crisp and brittle foods can be stored longer. Beef jerky and fruits such as cherries are usually dried until pliable and chewy.
But crisp fruit and vegetable chips make great snack foods. And brittle pieces (including fruit, vegetables, or meats) may be rehydrated by soaking in water for use in salads, breakfast cereal, tacos, and many other dishes.
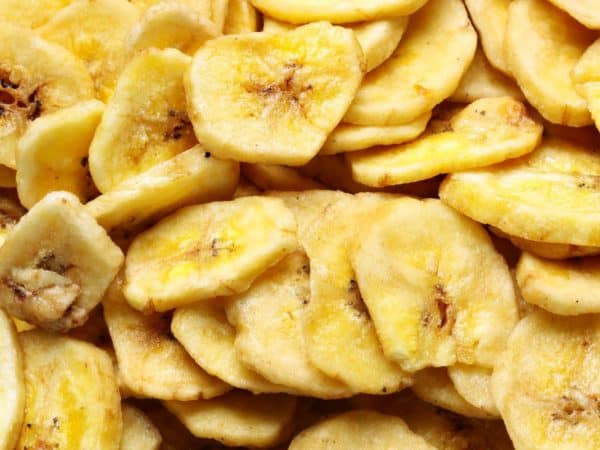
The extent of dryness is a matter of preference and depends on the intended use. Crisp dried bananas chips make great snacks!
The importance of conditioning dried foods
To guard against mold growth, you need to check for excess moisture before you package and store the dried food. This process is called “conditioning”.
In any batch of dried food, some pieces will be left with more moisture than others. If any pieces still contain too much moisture, they can grow mold and contaminate the entire batch. Conditioning equalizes the moisture by distributing it equally to all pieces of food in the batch.
To condition dried foods, place the entire batch in a tightly closed container at room temperature. Stir or shake the contents every day for a week. During this time, excess moisture in some pieces will transfer to drier pieces, until it is evenly distributed throughout the batch.
However, if moisture forms on the inside of the container, the batch is not sufficiently dry and you need to return it to the oven or dehydrator.
Packaging and storing dried foods
Package dried and conditioned foods in airtight containers, such as glass canning jars, food-safe metal containers, or zipper-style freezer-grade bags.
If using rigid glass or metal containers, choose a size that holds only enough food to be used at one time. You want to avoid reopening containers or leaving extra space, which can introduce moisture and cause mold growth. Zipper-style plastic bags allow you to push out excess air, regardless of the package size. Vacuum sealing is another good way to remove excess air.
- Great for gifting and crafting , BPA-free, Made in USA
- Food Grade Glass: The mason jars 16 oz with lids are made of high-quality food grade glass, BPA-free and lead-free, durable and sturdy for daily use. The transparent wall allows you to clearly distinguish what is inside. Note: The jars are safe for dishwasher and microwave but without the lid. To freeze, fill up to 12 oz.
- Tight Seal & Leakproof: The silver split-type lid of canning jars consists of a screw band and a flat metal disc with a silicone sealing ring on the rim, which can tightly seal the jar mouth and prevent air and excessive moisture in. No leakage, No spill, and keep fresh for longer!
- Use & Clean Easily: These pint canning jars with a 2.59" diameter regular mouth are easy to fill or empty drinks, fruits, veggies, herbs, sauces and spices. Dishware safe makes them have no trouble cleaning up, and It's also convenient to clean all corners of the jars by hand with our bonus sponge brush.
- CLEAR GLASS: The timeless clear finish of these canning jars looks elegant and rustic in your cupboards, shelves or refrigerator and allows you to easily identify contents. They're a handy, multi-purpose item for your kitchen, home, office or studio
- MULTIPLE USE: You can use canning jars to store fruits, vegetables, sauces, syrups and other condiments. These 16 oz regular mouth mason jars are also an ideal option for holding treats, snacks, arts and crafts supplies and more. The clear glass jars could be a great addition to any product line.
- KEEP FRESH: Includes matching regular mouth lids to help seal in freshness and flavor. Ball glass jars are ideal for the storage of of dry foods and snacks such as sugar, beans, peas, rice, oats, flour, pasta, cookies, crackers, and candies
To maximize storage life, store in a cool, dark place (40F to 70F). Lower temperatures will increase storage life; each 10-degree rise cuts storage time in half.
For example, dried food that lasts one month at 70°F will keep three months at 60°F, six months at 50°F, and one year at 40°F.
Crisp, brittle fruits and vegetables may keep up to 1 year (or longer). Pliable, chewy fruits and vegetables will keep 1 to 3 months. Meat jerky will keep 1 to 3 weeks. Vacuum sealing can extend storage times.
Examine your dried foods occasionally to check for evidence of moisture. Especially in late spring as temperatures warm up, I have sometimes noticed moisture or mold. If mold is present, unfortunately the entire batch must be discarded because it spreads unseen throughout food.
If moisture (but no mold) is present, freeze the food, or return to oven or dehydrator until conditioning indicates it is sufficiently dry again.
What is the best food dehydrator to buy?
Following are some suggested home food dehydrators. You don’t really need anything fancy to get started drying foods at home, but a good, reliable food dehydrator will be a good investment that won’t leave you frustrated.
Recommended inexpensive food dehydrator
My top pick is a basic food dehydrator that costs less than one hundred dollars and will efficiently dry many types of food. The Nesco Snackmaster is one of my favorite food dehydrators. (Presto is another good brand, though I haven’t personally used it.)
Basic models take up less space but have limited temperature ranges, vertical airflow, single-wall construction, and limited drying capacities. They’re great for first-timers, small apartments, and motor homes.
After you’ve dried a few foods, you may find you want a larger, more deluxe model.
Larger, deluxe food dehydrators
Deluxe models cost two to three times as much (or more) than basic models. They offer larger drying capacity, greater temperature range, more efficient horizontal airflow, and double-wall construction. Due to these design features, they tend to speed up drying time even when drying large quantities.
For a deluxe model, I recommend the Excalibur 9-Tray Dehydrator, which is manufactured in the U.S. Other highly rated deluxe food dehydrators include Cosori and Ivation, though I have not used these products.
Use these steps and tips to get started with drying foods. It’s one of the easiest and oldest food preservation methods. You can get started using your oven and a few common foods for snacks or to avoid food waste.
There are many more foods you can dry at home, including homemade spice mixtures and tea blends, trail mix and energy bars, dried soup mixes, and ready-to-heat meals. Find more recipes and techniques in my new book, Complete Dehydrator Cookbook by Carole Cancler, available on Amazon or from your favorite local bookstore. It’s an all-in-one guide to easy, affordable home drying, pairing delicious dehydrated foods with easy-to-navigate guidance to get you drying in no time.
[mv_create key=”5″ thumbnail=”https://livingonthecheap.com/lotc-cms/wp-content/uploads/2020/08/Depositphotos_155587988_xl-2015-sliced-tomatoes-on-drying-trays.jpg” title=”How to dehydrate food with or without a dehydrator” type=”diy”]
For more Living on the Cheap tips:
How to store fresh vegetables to avoid food waste
Save money by dehydrating your home-grown food
Preserve food with cheap canning equipment and free recipes
Freezer cooking 101: the key to healthy family dinners without a hassle


