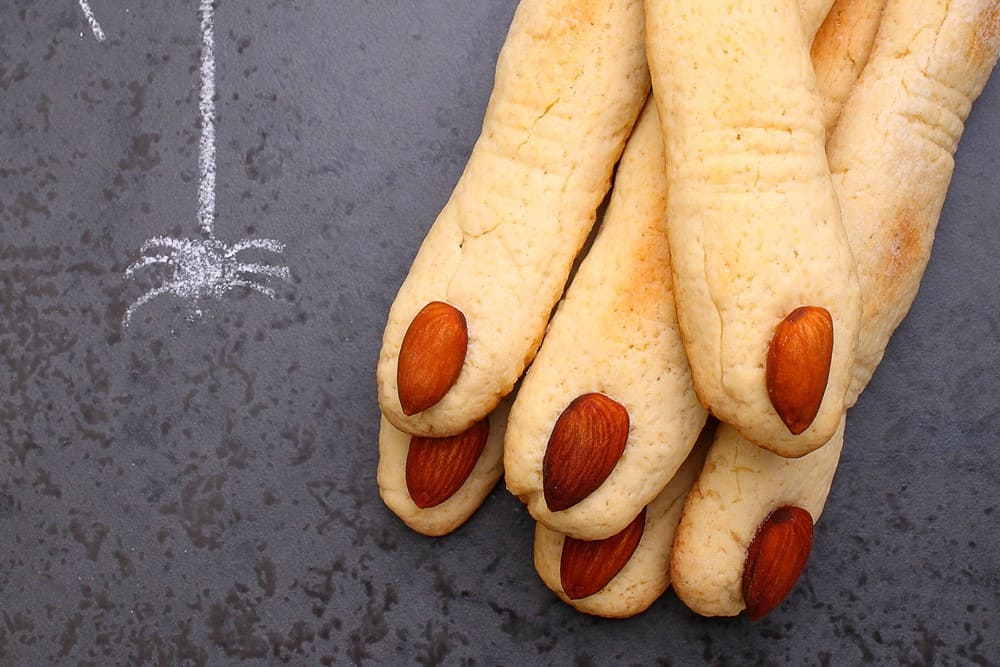
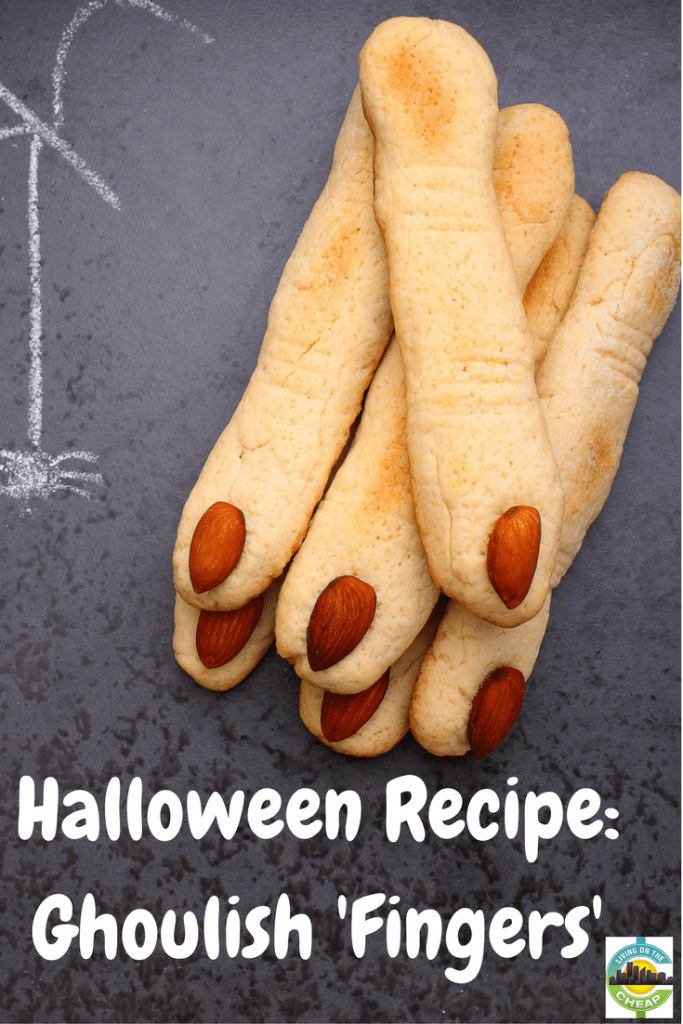
These creepy witch finger cookies are the perfect centerpiece for a Halloween party, but they are also tasty. The crisp, almond-flavored shortbread tastes even better after being stored, so make these ahead of time.

Kathy Mayers of Portland, Oregon, developed this Halloween finger cookie recipe and took the pictures. They are awesome and used with her permission.
How to make creepy Halloween finger cookies
Although they look ghoulish, there’s nothing but good ingredients in these delicious Halloween cookies. The dough is a very simple shortbread anyone can make, and the “fingernails” are simply whole blanched almonds (or almond slices) held on by decorator gel or raspberry jam.
Blanching almonds is a straightforward process that allows you to remove the peel from the almond for a more realistic look, but you don’t absolutely have to do it. You could leave the skin on and chalk up the darker nails to some kind of brown zombie nail polish. We’re all for easier!
If you do want to go for the skin-colored nails, just boil a pot of water on the stove. When it comes to a rolling boil, dump in a handful of almonds (not the whole bag). Leave them for sixty seconds or so and remove them with a slotted spoon and drop into a bowl of cold water for a few minutes to cool them down.
Once they’ve cooled a bit, drain the water and squeeze an almond between your fingers to remove the skin. Repeat the process until they’re all done. You may need to give them all one more rinse to remove any stray peels and then just pat them dry with paper towels.
What really gives these delightfully delicious cookies the creepy factor is the way you shape them! The Halloween finger cookies need knuckles as well as nails if you really want to make guests shudder before eating them.
The shortbread cookie dough needs to remain cold so cover the bulk of it and put it in the refrigerator while you shape just a small part – maybe a quarter of the batch – into finger shapes.
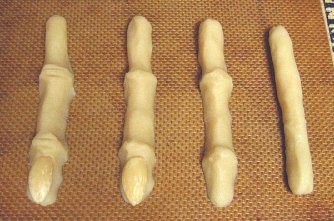
First you’ll roll the dough into four-inch skinny fingers. They’ll puff out as they cook, so make them a little skinnier than you want them to be in the end.
Then in each rolled piece you’ll pinch the dough in two places to make two raised areas. The top “knuckle” should be about an inch from one end and the middle knuckle will be about halfway down the roll.
 Once you’ve formed the knuckle ridges, take a knife and make two slashes into each raised area to resemble wrinkly knuckle skin.
If you’ll be using jam or jelly for the “blood” underneath the nail bed of the cookie fingers, just warm it in a pan over low heat on the stovetop. It will liquify a bit and be easier to work with. Alternatively, you could try heating it up for a few seconds in the microwave until it has melted. You can do this while the cookies are in the oven baking.
After the cookies have cooled, lift up the almond and spread a tiny bit of the jelly “goo” or red decorator’s gel at the tip of each finger cookie, then replace the almond fingernail.
Once all the cookies have been shaped, you’ll place them on greased cookie sheets in the oven for about 20-25 minutes. Cool them on a rack and then store them in an airtight container overnight or until you’re ready to serve.
Thankfully this isn’t the type of cookies best served hot out of the oven. They’re even better when they’ve been able to sit for a while, so you can make them in advance. (You’ll have enough to do on Halloween night.)
There’s really only one time of year when these cookies are the perfect snack, so don’t miss your opportunity to try them!
[mv_create key=”6″ thumbnail=”https://livingonthecheap.com/lotc-cms/wp-content/uploads/2015/10/halloween-fingers.jpg” title=”Halloween Witch Fingers Recipe” type=”recipe”]
Halloween Cookie Fingers Recipe
1 cup butter, softened
1 cup powdered sugar
1 egg
1 tsp almond extract
1 tsp vanilla
2 2/3 cups flour
1 tsp baking powder
1/4 tsp salt
3/4 cup almonds, whole blanched
1 tube red decorator gel or raspberry jelly or jam (melted over low heat in a saucepan)
In bowl, beat together butter, sugar, egg, almond extract and vanilla. Beat in flour, baking powder, and salt to make a very stiff dough. Cover and refrigerate 30 minutes.
Working with one quarter of the dough at a time and keeping remainder refrigerated, roll heaping spoonful dough into a thin log shape about 4 inches long for each cookie. Squeeze in center and close to one end to create knuckle shapes. Press almond firmly into the end of the cookie for nail. Using paring knife, make slashes in several places to form a knuckle. You want the fingers to be a bit thin and gangly looking, since they’ll puff a little when you bake them.
 Place on lightly greased baking sheets; bake in 325 F oven for 20-25 minutes or until pale golden. Let cool for 3 minutes. Lift up almond, squeeze red decorator gel onto nail bed and press almond back in place, so gel oozes out from underneath. You can also make slashes in the fingers and fill them with “blood.”
Yield: 5 dozen
More cheap and easy Halloween ideas:
How to make an easy jack-o-lantern cake for Halloween
4 fun, cheap Halloween alternatives
Free pumpkin stencils for Halloween carving
8 ways to save on Halloween candy
Throw a Halloween bash on a budget
Host a Halloween movie night party
Cheap and easy DIY Halloween costumes
Cheap and easy Halloween costumes for pets

All Halloween Articles
Halloween parties and entertaining
Throw a Haunting Halloween Bash on a Budget
Scary good (and cheap) Halloween party food
Host a Halloween movie night party
Halloween costumes
Cheap and easy DIY Halloween costumes
Cheap and easy pet Halloween costumes
Fall and Halloween decorating
4 easy and cheap Halloween decorations
Make a scarecrow from items you have at home
Build a haunted wedding Halloween display in your yard
Free pumpkin stencils for creative carving
Halloween food & recipes
Scary good (and cheap) Halloween party food
8 ways to save on Halloween candy
How to make tasty, ghoulish Halloween finger cookies
Cute and easy jack-o-lantern cake
Other budget-friendly Halloween ideas
