I remembered learning how to make a rubber band-powered boat out of a Styrofoam plate when I was young, and just knew it would make for some thrifty fun at home. This project was a hit at my house. Kids making their own toys — what’s not to love? It’s frugal and it keeps the kids busy when you most need it.
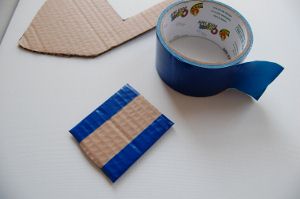
The supplies are simple. You’ll need a rubber band, scissors, marker, straight edge and some type of material that will float and can be cut with scissors. We didn’t have any foam plates on hand, so we used a piece of cardboard that we covered with duct tape to make it more water-resistant. You can use milk cartons, plastic lids, and any other material you have on hand.
(Update: I finally bought some balsa wood and made the boat with that! I’ve included step-by-step pictures of the balsa wood rubber band boat alongside the originals. It is sturdier than our cardboard version, but I still love the idea of making toys from what you have on hand. Part of the fun is coming up with ideas and trying different materials.)
The exact measurements are not really important here. Since you’ll be using “found” (and free) materials, adapt the proportions as needed.
Step one: Use a ruler or straight edge to draw a rectangle on one end of your cardboard or balsa wood, leaving an inch or so on on either side. On the other end, draw the “boat” shape (see photo).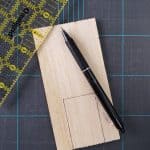
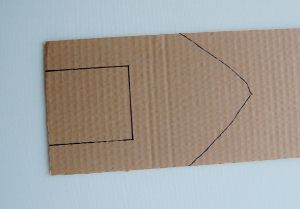
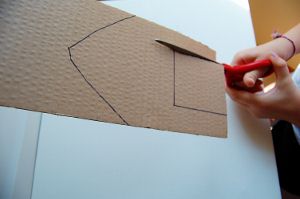
Step two: Cut out your rectangle, and set that piece aside. You’ll need it later to use as a propeller. Then cut around your boat-shaped lines.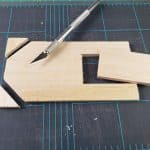
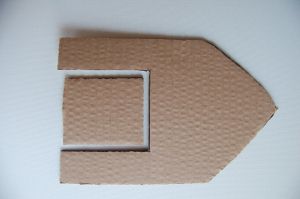
Step three: Now take the rectangle that you set aside and trim it by about a quarter of an inch on all sides. This doesn’t have to be exact, but it will need room to move freely when it is placed back into the space you cut it from.
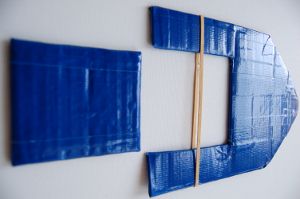
Step four: If you used cardboard, as we did, you may want to cover your pieces with duct tape so your boat doesn’t get soggy and sink. If you use balsa wood, nothing else is needed, although you could paint your rubber-band boat after you’ve tested it and know it works. (Just give it plenty of time to dry out before painting.)
Step five: Slip the rubber band onto your boat, over the empty space you cut out. Place the propeller (the rectangle you cut out and trimmed) into the rubber band, wind it up, and let it go. Does it move freely? You might find that you need to trim it a bit more.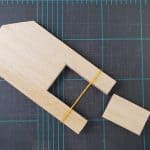
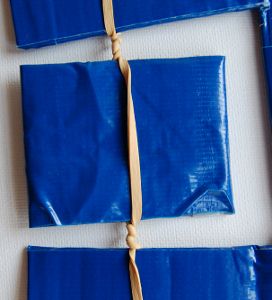
Step six: Wind up the propeller again…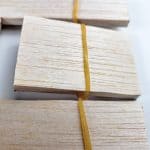
Step seven: Now that your propeller is wound, just place the boat in a bathtub or backyard pool and let it go! Watch the video below for a demonstration of how the rubber band boat works!
[mv_create key=”10″ thumbnail=”https://livingonthecheap.com/lotc-cms/wp-content/uploads/2021/01/rubber-band-boat-wind-the-propeller-3-scaled.jpg” title=”How to make a rubber band boat (easy)” type=”diy”]
If you liked this article, you may also enjoy:
- Top 10 boredom-busting DIY toys for kids
- Fun snow activities for kids
- Keep the kids cool with DIY ice pops
- Kids’ crafts: Make a braided-rope dog toy
- Top 10 DIY outdoor toys and summer activities for kids
- Cheap and simple water toys
See the video tutorial: rubber band boat